 Stainless Steel & High Tensile Steel Bolts & Quality Parts |
Home About Technical & FAQ How To Buy & Contact Terms & Conditions of Sale Links |
|


Product Catalogues
VW Split Screen Van
VW Bay Window Van
VW Beetle
VW Type 3
VW Thing / Trekker
VW Karmann-Ghia
VW Engines T1+T4
VW Electrical
IGNITION SYSTEMS
TOOLS
Product Catalogues
Air Cooled Porsche
Rover V8 Parts
Ford Kits
BMC Era Car Parts
Land Rover Kits
|
As part of our Type4 Engine installation we opted to replace our gearbox mounts with
Something fresh and more in-line with taking a 2.1 litre engine. The old mounts were original factory installed 1970 items so they were allready worn and distorted from nearly 40 years of use anyway.!! Working from the nose-cone mounts first - you need to undo and remove the 4 bolts that hold the nose-cone gearbox mount in place (note : the Earth strap that connects the Gearbox to the chassis fits here : its a worthy investment to replace this while you are working here.!). 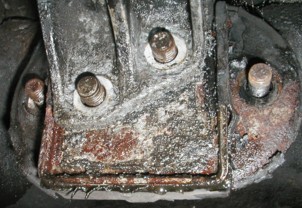 If you replacing the rear gearbox mounts as well then you need to remove the 8 nuts that hold the rear gear-box carrier mounts in place (pointed to AND ringed in Orange in the below picture) If you are replacing the front nose-cone mount only then you can just remove the bolts that hold the gear-box carrier in place to the frame fork ends : these are highlighted in Blue. stage.  Remove the cover-plate to the gear-box selector linkage (under the rear seat of the car) - and then remove the 'pinch screw' that secures the selector linkage to the gear-box (it is a square-headed screw - we found an 8mm spanner fitted it perfectly. Note : there is a wire-tie that has to be snipped and removed : you will need to replace this later - some 1mm^2 electrical copper wire (stripped from the insulation) can be used for this once the works are completed. 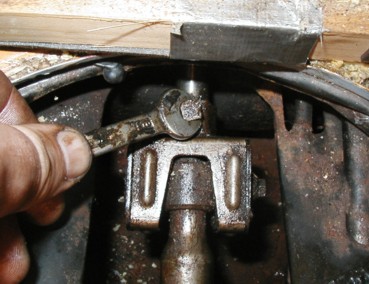 Most manuals say to chissel a marker into the spring-plate \ rear axle set-up so you can see where everything aligned. We opted for a quick spray of primer paint such that the set-up was 'shadowed boarded' onto the hardware for later re-assembly. We also chissled small notches as per standard manual instructions so we could compare the two methods for effect. 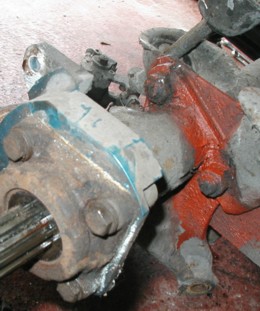 Remove the LOWER shock absorber bolts and REMOVE the THREE Spring Plate Bolts on each side. The Spring Plate bolts are M12 and take a 17mm socket - we found having a selction of tools helped : Draper extending wheel-brace, standard 4-way wheel brace (which has a 17mm socket on one of four ends), 17mm Impact Socket and 3/8" drive etc. You can see in the below picture that we had to strip the brake asemblies \ bearing covers off the axle ends such that we could get good tool acccess to the Spring Plate bolts. 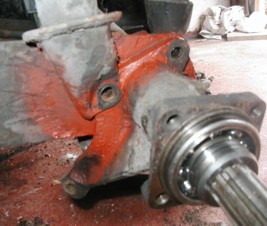 To release the nose-cone mount you need to move the gear-box approx. 3"-4" inches (approx) rear-wards such that the gearbox mount can be drawn over and off the mounting studs (hence freeing up the axle-tubes from the spring plates etc.) We did try just drawing the gear-box backwards with the natural lash in the differntial etc. (some people had reported via forums that this was sufficient) - but we found on our 1500 Beetle that we need another 1"-2" inches of freeplay to drop the old mount. To draw the gearbox backwards off its rear mount you need to place a trolly-jack underneath it and jack it up such that the trolly jack is supporting the gearbox weight rather then the gearbox-mounts - you can then use the trolly-jack to draw the gearbox backwards off its mounts. (below picture taken a bit later in time but it does show you the principle. 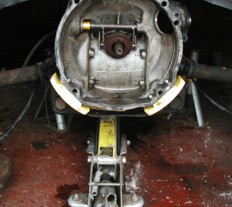 To help generate the free-play as you draw the gearbox backwards you will have to drift the axle-tubes backwards in their sping plate mountings....BUT NOT OUT OF THE SPRING PLATES....just enough to drop the gearbox mount.! They can be GENTLY persuaded backwards with hammer blows to the cast-iron tubes - a little at a time on BOTH sides. Check progress by drawing the gearbox backwards on the trolly-jack to see if the gearbox mounting can be freed. IF YOU KNOCK THE AXLE TUBES TOO FAR BACK THEY WILL DROP OUT OF THE SPRING PLATES - YOU DO NOT HAVE TO DRIFT THEM BACK THIS FAR. RE-INSTALLING THEM TO THE SPRING PLATES IS EXTRA WORK THAT YOU DO NOT NEED TO CREATE FOR YOURSELF - SO BE CAREFUL.!! (Unless you also intend to lower the rear suspension a spline or two while you are there.) 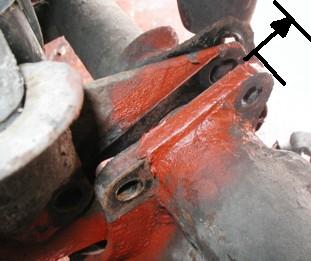 Once enough space is generated the old gear-box mount just 'flops out' and a new mount just 'slots in'. 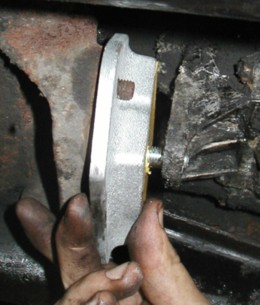 The new gearbox mount (the above is a CB Performance 'Rhino' Mount) then slots straight back in. For reference we ditched the CB mount as the tooling access to re-tighten the nuts to secure it was V.Poor : they had not allowed enough clearance around the casting to allow 'normal' socket or spanner access - and we did not want (or recommend) using thin-wall nuts to get around this problem. Its a poorly designed piece. On consulation with some UK tuning companies (with years of experience of performance type4 motors) we switched back to a stock VW gear-box mount as per below.....(cheaper and still unsurpassed in practical performance.) The general 'vibe' was that Eurathane mounts are more prone to distortion and lack the flexibility & vibration damping performance of stock mounts as the Eurathane is a lot more rigid a material. 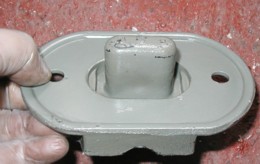 Slide the gearbox back onto the rear mount. Pop the Earth cable back onto the stud. Replace the four bolts loosly with fresh 10 grade HT bolts. Re-align the spring-plates with the axle-shaft tubes (as per the shadow-board primering earlier) and then re-fit the Spring Plate bolts (with fresh 10:9 grade bolts). We found the shadow-boarding effect of the primer to be VERY effective - everything slotted back exactly where the Wolfsburg factory had put it in the first place.! The alignment can be fine-tuned with gentle hammer taps to the axle-tubes etc. such that they are teased into the correct position Remember to fit a flat washer under the heads of the bolts....and then fit a flat washer under the spring washer under the nut (spring washers ALWAYS fit under the nut - its the nut that gets TURNED - NOT the bolt. 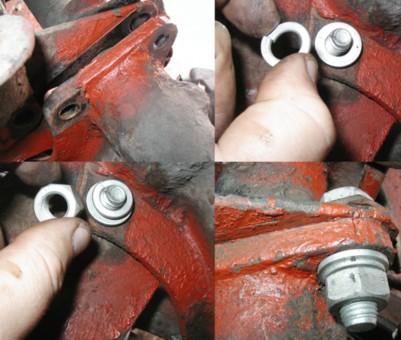 Tighten the spring-plate and nose-cone gearbox mounts up to the appropriate torque setting once all works have been performed around the gear-box and axles. |